Are your hardwood floors looking worn out, scratched, or lacking their former lustre? If so, let’s consider floor sanding. Whether dealing with floorboards in an old Victorian home or sleek hardwood flooring in a modern apartment, sanding can breathe new life into your floors, revitalising their appearance and durability.
In this comprehensive manual, we’ll explore the ins and outs of floor sanding, floorboard sanding, and sanding floorboards, helping you achieve professional results and restore the beauty of your wooden floors.
Understanding Floor Sanding:
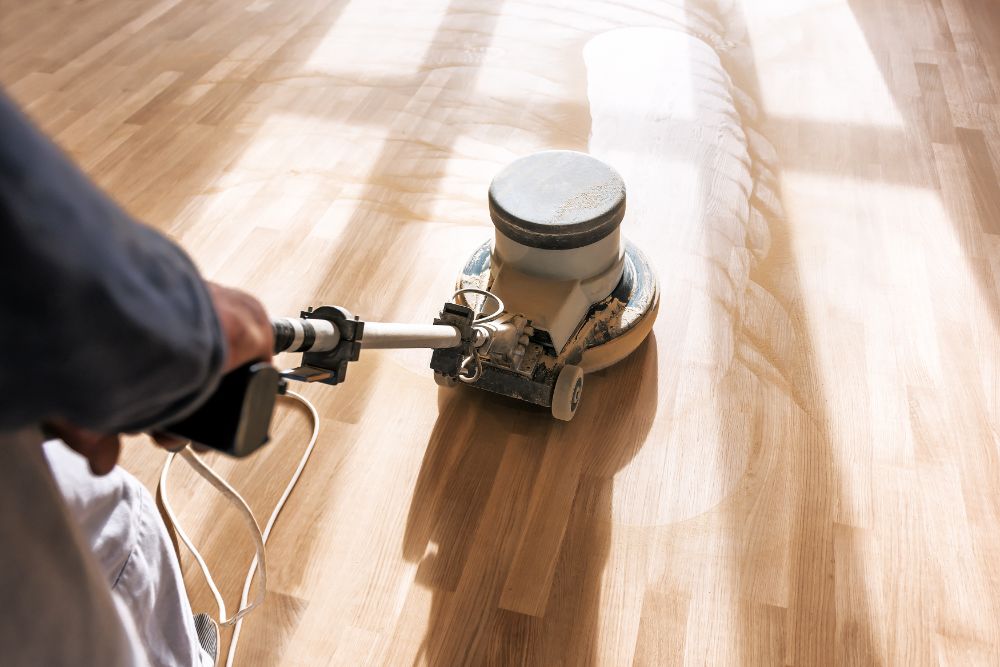
Floor sanding is a process that involves removing the top layer of wood from your floors using abrasive materials such as sandpaper or Floor Sanding Machines. The goal is to eliminate surface imperfections, scratches, stains, and unevenness, creating a smooth and uniform surface for refinishing.
Steps Involved in Floor Sanding:
Preparation: Before beginning the sanding process, it’s essential to prepare the room by removing furniture, rugs, and any other obstacles that may hinder access to the floors. Additionally, ensure that the floors are free of dust, dirt, and debris.
Initial Sanding: The first step in floor sanding involves using coarse-grit sandpaper or a floor sanding machine to remove the top layer of wood and address deep scratches and imperfections. This initial sanding level prepares the surface for finer sanding and smoothing.

Intermediate Sanding: Once the initial sanding is complete, switch to a finer grit sandpaper or machine to smooth the surface further and remove any remaining imperfections. This stage is crucial for achieving a uniform and seamless finish.
Final Sanding: The final sanding stage involves using the finest grit sandpaper or machine to achieve a smooth and polished surface. Depending on your preferences, this step prepares the floor for staining, sealing, or finishing.
Tips for Successful Floor Sanding:
Ensure proper ventilation and wear appropriate safety gear, including a dust mask and protective eyewear, to minimise exposure to airborne dust and debris.
Work systematically, sanding one-floor section at a time and overlapping each pass to ensure uniformity.
Take breaks to prevent fatigue and maintain focus throughout the sanding process.
Clean the floors thoroughly between sanding stages to remove dust and debris, ensuring a smooth and even finish.
Consider hiring a professional Floor Sanding Company for larger or more complex projects to ensure optimal results and minimise the risk of damage to your floors.
Floorboard Sanding vs. Sanding Floorboards:
While “floorboard sanding” and “sanding floorboards” are often used interchangeably, they refer to the same process of sanding wooden floors. Whether you have solid hardwood floorboards, engineered wood flooring, or laminate floorboards, the sanding process remains consistent, focusing on restoring the natural beauty and integrity of the wood.
In Conclusion:
Floor sanding is a transformative process that can revitalise the appearance and durability of your wooden floors, regardless of their age or condition. By following the steps outlined in this comprehensive manual and taking appropriate precautions, you can achieve professional results and enjoy stunning hardwood floors that enhance your home’s or commercial space’s beauty and value. Whether you’re tackling floor sanding as a DIY project or enlisting the help of professionals, the result will be floors that shine with renewed elegance and charm for years to come.